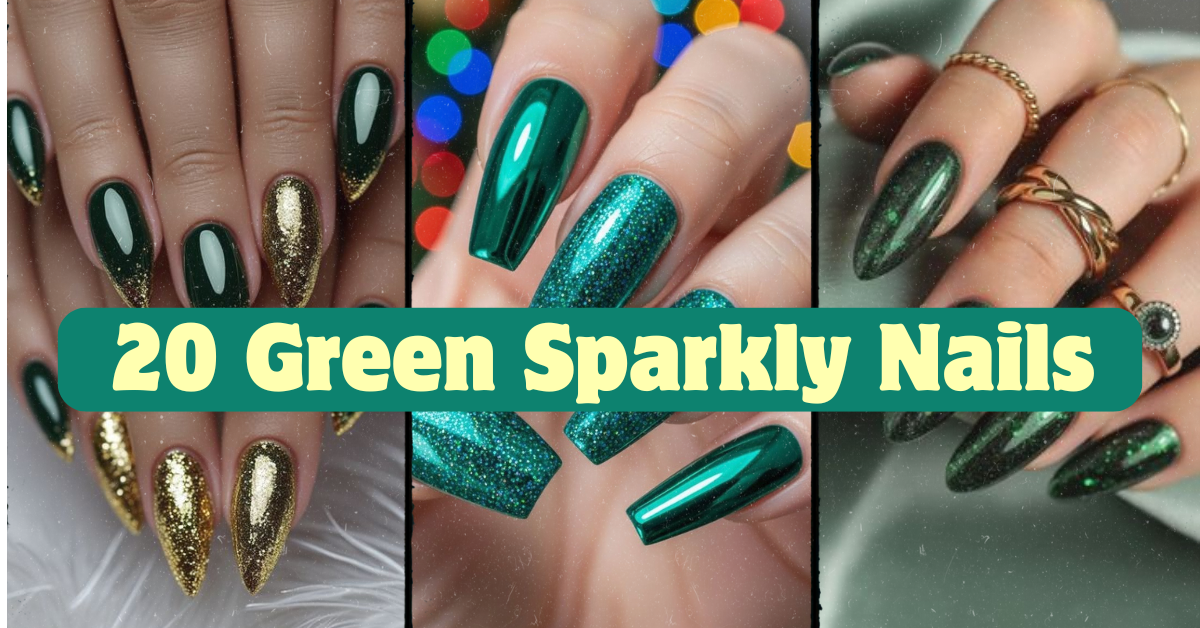
20 Green Sparkly Nails That’ll Make You Ditch Every Neutral Manicure
Green sparkly nails have quickly become one of the most requested looks at salons, and after digging through hundreds of designs, testing formulas, and talking to nail techs about what actually holds up in real life, I’m confident this list covers the best of what’s out there. I’ve sorted through the glittery chaos so you don’t have to, pulling together looks that photograph beautifully and survive an actual work week.
So what are the best green sparkly nail designs? Emerald chrome, forest green ombre, and sage shimmer top the list for versatility. Gel polish with fine glitter (not chunky) resists chipping best, and pairing green with gold or silver accents keeps the look elevated rather than costume-like.
Stick around, because I’m breaking down all 20 looks with the exact shape, polish type, and application tricks that make each one last longer than three days. I’ll also flag which designs are DIY-friendly and which ones you’ll want to leave to a professional.
Why Green Sparkle Is Having Such a Big Moment
Green just works. It’s the color of money, luck, nature, and apparently, really good nail art right now. Sparkly green nails hit different because green already reads as rich and grounded, and adding shimmer or glitter on top gives it a little extra drama without making it feel over the top. Whether you’re into deep emerald, mossy olive, or a bright neon shade, there’s a green-and-sparkle combo that fits your style. Below, I’ve broken things down by shape, occasion, and how much upkeep each design actually needs, because let’s be honest, nobody wants a manicure that looks amazing on day one and sad by day four.
Emerald Chrome Mirror Nails

Nothing says luxury quite like a mirror finish, and emerald chrome nails prove that green can look expensive without a single rhinestone. This look starts with a dark green gel base, cured and buffed smooth, then chrome powder is pressed on with a soft applicator to create that glassy, liquid-metal effect. Almond or coffin shapes show off the mirror shine best because the light bounces across a longer surface.
This one’s gel-only since chrome powder needs a tacky top coat to stick. It’s date-night and holiday-party ready, but honestly works for weddings too if you want something bold under the veil. Tip: apply chrome in small circular motions instead of swiping to avoid streaks. The vibe? Straight-up glamorous.
Forest Green Glitter Ombre

Ombre nails never really left, and forest green fading into gold or bronze glitter feels like autumn wrapped up in a manicure. Start with a deep forest green at the cuticle and sponge fine gold glitter polish toward the tip, blending with a makeup sponge for that soft gradient. This works on almost any shape, though squoval and medium almond nails show the gradient transition most clearly.
Dip powder holds up longer here since ombre gel can sometimes shift unevenly if not cured properly between layers. It’s a great pick for fall weddings, cozy date nights, or everyday wear when you want something a little more expressive than a solid color. Seal with a thick glossy top coat to lock in glitter placement. Next up, a sparklier cousin of this look.
Holographic Green Confetti Nails

If forest green ombre is subtle, holographic green confetti nails are the opposite: loud, fun, and impossible to ignore. This design layers chunky holographic glitter pieces over a sheer green gel base, so light catches every angle differently depending on how you move your hand. Shorter shapes like round or squoval work best since chunky glitter can feel bulky on long extensions.
This one’s easier as a gel or acrylic overlay because the glitter needs to be sealed flat under a thick top coat to avoid snagging on clothes or hair. It’s perfect for festivals, birthdays, or New Year’s Eve when you want maximum sparkle. Building glitter in two thin layers instead of one thick coat helps distribute pieces evenly. The overall feeling is playful and just a little bit chaotic in the best way.
Deep Green with Gold Flake Accents

Gold flakes scattered over a deep hunter green polish give off old-money energy without trying too hard. The technique is simple: paint two coats of a rich green gel, then use tweezers or a dotting tool to place gold leaf flakes randomly across one or two accent nails while the top coat is still tacky. Medium-length almond or coffin nails give the flakes enough room to shine without overcrowding the nail bed.
This design works with gel or regular polish, though gel seals the flakes more securely for daily typing and activities. It’s a strong choice for holiday parties, formal events, or even a bridal look if gold matches the wedding color scheme. Keep flake placement asymmetrical for a more natural, less “kit-made” appearance. The result feels elegant, a touch vintage, and genuinely photo-worthy.
Mint Green Glitter Tips

Mint green is softer and more wearable than deep emerald, making it a great entry point if you’re new to colored nails altogether. Glitter tips take a classic French manicure and swap the white tip for chunky or fine silver glitter, layered over a pale mint base. Short to medium oval or squoval nails suit this look particularly well since it keeps things clean and office-appropriate.
Dip powder or gel both work, though dip tends to give a smoother, more even glitter edge without brush strokes. This is an easy everyday design, but it also works for spring events, baby showers, or beach vacations when you want something fresh but not overly bold. Use tape to mask the tip line before applying glitter for crisper edges. It reads soft, sweet, and effortlessly put-together.
Bottle Green Velvet Sparkle

Matte polish gets a bad reputation for looking flat, but bottle green velvet sparkle proves otherwise. This design uses a matte green top coat over a shimmer base, so the sparkle peeks through in a muted, almost fabric-like texture. Coffin and stiletto shapes photograph especially well here since the matte finish emphasizes the nail’s structure and length.
Gel is the better choice for this one because matte top coats applied over regular polish tend to wear down faster and lose their texture within a couple of days. This look fits fall and winter seasons beautifully, and it’s a favorite for cozy date nights or holiday gatherings where you want something rich but not shiny. Avoid cuticle oil directly on the nail plate since oils can dull matte finishes prematurely. The overall vibe leans moody, sophisticated, and a little unexpected.
Green to Black Glitter Fade

For anyone who loves a darker, edgier aesthetic, fading emerald green into black glitter at the tips creates serious drama. The technique mirrors a classic ombre but swaps the lighter gradient direction, going from vibrant green at the cuticle into deep black glitter toward the tip. Longer shapes like coffin or stiletto give this fade more visual runway to work with.
Gel polish handles this best since black glitter tends to need extra curing time to sit smooth without clumping. This design works for concerts, Halloween, or edgy date-night looks, and honestly it transitions well into winter too. Blend the two colors while both are still slightly wet using a small fan brush for the smoothest transition. It gives off bold, rocker-chic energy without feeling costume-like.
Sage Green Shimmer Nails

Sage has become the unofficial color of quiet luxury, and adding a fine shimmer takes it from “nice neutral” to “wait, where did you get your nails done.” This look uses a soft sage base polish mixed with micro-fine shimmer particles, applied in two thin coats for even coverage. Almond and squoval shapes at short to medium length keep this design looking polished and work-appropriate.
Regular polish or gel both work well since the shimmer is fine enough not to require special sealing techniques. It’s genuinely one of the most versatile options on this list, fitting everyday wear, work meetings, and casual outings equally well. Apply top coat in a thin layer to avoid dulling the shimmer’s natural glow. The vibe here is calm, minimalist, and quietly elegant.
Emerald Rhinestone Accent Nail

Sometimes less really is more, and a single accent nail with rhinestones proves it. This design keeps four nails a clean, glossy emerald green while the ring finger gets a cluster of small rhinestones arranged in a swirl or line pattern near the cuticle. Medium almond or oval shapes give rhinestones a stable, flat surface to adhere to.
Gel is strongly recommended here since rhinestones need a hard, tacky top layer to stay put through daily hand-washing and typing. This works beautifully for weddings, engagement parties, or any event where you want a little sparkle without overwhelming your whole hand. Use nail glue as backup adhesive under each stone for extra hold between fills. The result feels glamorous but still tasteful enough for formal settings.
Green Glitter French Tips

The French manicure gets a glitter glow-up when the classic white tip is replaced with chunky green glitter instead. This version keeps the natural or sheer pink base and adds sparkle only at the tip, making it a low-commitment way to try colored nails. Short and medium squoval or almond shapes suit this look since it echoes the traditional French silhouette.
Dip powder gives the cleanest tip line for beginners, while gel allows more flexibility for custom shapes and freehand designs. This design works for basically everything: job interviews, weddings, everyday errands, or vacation. Use a thin nail art brush to clean up any glitter that strays past the tip line before curing. It’s classic, fresh, and easy to recreate at home.
Olive Green Metallic Sparkle

Olive green has quietly taken over as the go-to neutral-adjacent shade for people who want color without looking too bold, and a metallic sparkle finish makes it pop just enough. This look layers a metallic olive polish under a fine glitter top coat, giving nails a warm, almost bronze-green glow depending on the lighting. Medium coffin or almond shapes work well since the metallic finish catches light along longer nail beds.
Gel polish holds the metallic sheen far longer than regular lacquer, which tends to look patchy within a few days. This design fits fall settings especially well, along with work environments where a subtle sparkle feels more professional than a bold glitter. Buff lightly between coats to prevent streaking in the metallic base. It reads earthy, warm, and effortlessly cool.
Jade Glitter Almond Nails

Jade green sits somewhere between emerald and mint, and paired with fine glitter, it creates a soft but noticeably shimmery look that works almost anywhere. The technique layers a jade gel polish with a glitter-infused top coat, avoiding chunky pieces so the shine stays subtle rather than sparkly-overload. Almond shape genuinely makes this design; the tapered tip elongates the glitter’s shine across the whole nail.
This one’s beginner-friendly and works with gel, dip, or even regular polish depending on how long you want it to last. It suits spring and summer occasions particularly well, from brunch dates to beach vacations, since jade feels fresh and light. Apply glitter top coat in a patting motion rather than swiping for even distribution. The overall feeling is soft, feminine, and easy to wear daily.
Green to Gold Sparkle Ombre

Combining two of the richest colors in the sparkle-nail world, green to gold ombre creates a look that feels almost regal. The gradient starts with a jewel-tone green at the base and fades into fine gold glitter toward the tip, blended carefully with a sponge or brush. Coffin and stiletto shapes give this ombre the most dramatic visual length.
Gel or dip powder both handle this well, though dip tends to create a slightly smoother blend for beginners. This design is a favorite for weddings, especially for those wanting green and gold as part of their color scheme, and it also works beautifully for holiday parties. Cure each gradient layer separately before adding the next to avoid smudging the transition. It gives off rich, celebratory, borderline-royal energy.
Neon Green Glitter Pop

For anyone who wants their nails to be the loudest thing in the room, neon green glitter delivers instantly. This look uses a bright neon green base, which typically needs two to three coats for full opacity, topped with a fine or holographic glitter layer for extra dimension. Short to medium round or squoval shapes work best since neon shades already draw plenty of attention without needing extra length.
Gel is the more reliable choice here since neon pigments in regular polish can sometimes look streaky or uneven without a solid gel base beneath them. This design is ideal for summer festivals, pool parties, or beach vacations where bold color feels totally appropriate. Apply a UV-protectant top coat if you’ll be spending time in direct sunlight, since neon shades can fade faster with sun exposure. The vibe is fun, energetic, and impossible to miss.
Green Glitter Negative Space Nails

Negative space designs have stuck around for a reason, and adding green glitter into the mix keeps things modern without losing that clean, artistic feel. This look leaves part of the natural nail bare, usually near the cuticle or in a geometric shape, while the rest of the nail gets a green glitter gradient or solid glitter fill. Squoval and almond shapes at short to medium length show off the negative space cutouts most clearly.
Gel works best since the sharp lines needed for negative space require precise application and a strong seal to prevent lifting at the edges. This design suits work environments, casual outings, or minimalist aesthetics where you want texture without a fully covered nail. Use striping tape to map out the bare sections before applying glitter polish. It feels modern, artistic, and a little edgy.
Christmas Green Glitter Nails

Around the holidays, a rich Christmas green paired with chunky red and gold glitter accents turns nails into tiny festive decorations. This design typically uses a deep pine green base with one or two accent nails covered in mixed glitter, sometimes including small star or snowflake charms. Medium almond or coffin shapes give enough surface area for charms to sit properly without looking cramped.
Gel is the way to go here since holiday designs often involve charms or 3D elements that need a strong adhesive base. This one’s obviously built for the holiday season, whether that’s family gatherings, office parties, or New Year’s celebrations. Seal charms with an extra layer of clear gel around the edges to prevent snagging or lifting. The overall feeling is festive, cozy, and genuinely fun to wear through December.
Green Glitter Coffin Nails

Coffin shape and glitter were basically made for each other, since the flat, squared-off tip gives glitter polish a big, flat runway to shine across. This design usually goes bold, using medium to long coffin nails covered edge to edge in chunky green glitter, sometimes mixed with holographic pieces for extra dimension. It’s a statement look, best suited for special occasions or anyone who genuinely loves long nails.
Acrylic or gel-x extensions work best here since natural nails typically aren’t long enough to achieve the dramatic coffin shape without added length. This design fits birthdays, glam nights out, or vacation looks where you want maximum visual impact. Apply glitter in thin layers and cure fully between each to avoid a lumpy texture. It’s bold, glamorous, and unapologetically loud.
Seafoam Green Shimmer

Seafoam sits somewhere between green and blue, and with a light shimmer finish, it feels like a little piece of summer no matter what season it actually is. This design uses a pale seafoam polish mixed with fine, cool-toned shimmer, applied in thin, even layers to avoid a chalky appearance. Oval and squoval shapes at short to medium length keep this look soft and wearable for daily life.
Regular polish or gel both work fine since the shimmer is subtle enough not to require special sealing. This design fits beach vacations, casual summer days, or even office settings where a light shimmer feels more professional than glitter. Apply a glossy top coat to enhance the shimmer’s natural reflection. It feels breezy, calming, and effortlessly pretty.
Green Glitter Snowflake Accent Nails

Winter-specific designs don’t have to feel childish, and green glitter paired with delicate snowflake accents proves that. This look keeps most nails a solid deep green glitter or shimmer, while one or two accent nails feature small white snowflake decals or hand-painted details. Medium almond or coffin shapes give snowflake details enough space to actually read clearly instead of looking smudged.
Gel is recommended since snowflake decals need a strong top coat to stay flat and prevent lifting at the edges. This design is perfect for winter holidays, ski trips, or festive parties where you want something wintry but still elegant. Apply decals with tweezers directly onto tacky gel before curing for the cleanest placement. The vibe is charming, seasonal, and a little bit magical.
Duochrome Bottle Green Sparkle
Duochrome polish shifts color depending on the angle and lighting, and paired with a deep bottle green base, it creates a genuinely mesmerizing effect somewhere between green, blue, and purple. This design layers a sheer duochrome topper over solid bottle green, letting the color-shift happen naturally without extra glitter needed. Almond and coffin shapes at medium to long length give the color shift the most visual room to move.
Gel is essential here since duochrome pigments need a smooth, glassy base to reflect light properly. This design works incredibly well for evening events, weddings, or holiday parties where you want something that looks different in every photo. Apply the duochrome topper in thin, even strokes to avoid streaking the color-shift effect. It feels mysterious, glamorous, and genuinely unique.
Green Sparkly Nails Comparison Table
| Design | Best Nail Shape | Best Occasion | Polish Type | Season/Setting |
|---|---|---|---|---|
| Emerald Chrome Mirror | Almond, Coffin | Date night, Holiday | Gel | Fall, Winter |
| Forest Green Ombre | Squoval, Almond | Fall wedding, Everyday | Dip powder | Fall |
| Holographic Confetti | Round, Squoval | Festival, NYE | Gel/Acrylic | Any season |
| Gold Flake Accents | Almond, Coffin | Formal, Bridal | Gel | Winter, Holiday |
| Mint Glitter Tips | Oval, Squoval | Everyday, Spring event | Dip powder | Spring, Beach |
| Bottle Green Velvet | Coffin, Stiletto | Date night, Holiday | Gel | Fall, Winter |
| Green to Black Fade | Coffin, Stiletto | Concert, Halloween | Gel | Fall, Winter |
| Sage Shimmer | Almond, Squoval | Work, Everyday | Gel/Regular | Any season |
| Emerald Rhinestone | Almond, Oval | Wedding, Formal | Gel | Any season |
| Green French Tips | Squoval, Almond | Work, Everyday | Dip powder | Any season |
| Olive Metallic Sparkle | Coffin, Almond | Work, Fall event | Gel | Fall |
| Jade Glitter Almond | Almond | Brunch, Beach | Gel/Dip/Regular | Spring, Summer |
| Green to Gold Ombre | Coffin, Stiletto | Wedding, Holiday | Gel/Dip | Fall, Winter |
| Neon Green Pop | Round, Squoval | Pool party, Festival | Gel | Summer |
| Negative Space Glitter | Squoval, Almond | Work, Casual | Gel | Any season |
| Christmas Green Glitter | Almond, Coffin | Holiday party | Gel | Winter |
| Green Glitter Coffin | Coffin | Birthday, Vacation | Acrylic/Gel-x | Any season |
| Seafoam Shimmer | Oval, Squoval | Beach, Casual | Gel/Regular | Summer |
| Snowflake Accents | Almond, Coffin | Winter holiday, Ski trip | Gel | Winter |
| Duochrome Bottle Green | Almond, Coffin | Evening event, Wedding | Gel | Fall, Winter |
Quick Terms to Know Before You Book Your Appointment
Understanding the difference between application methods makes it way easier to communicate with your nail tech, or attempt these looks yourself.
Gel polish
: A polish cured under UV or LED light, offering a glossy, chip-resistant finish that typically lasts two to three weeks.
Acrylic
: A powder-and-liquid combination sculpted onto the nail, often used for adding length or creating durable extensions.
Dip powder
: Colored powder applied over an adhesive base, building color and strength without needing a UV lamp to cure.
Gel-x
: Pre-made gel extensions applied over a tip, offering length similar to acrylic but with a lighter, more flexible feel.
French tip
: A classic style with a colored or clear base and a contrasting color, usually white, applied only at the tip.
Reverse French
: The same concept as a French tip, but the contrasting color sits at the cuticle instead of the tip.
A Few Extra Tricks for Longer-Lasting Sparkle
- Always cap the free edge with top coat, glitter tends to lift first at the tip.
- Fine glitter lasts longer day-to-day than chunky glitter, which can catch on fabric.
- Rotate cuticle oil use if you’re wearing matte or chrome finishes, since oils can dull certain textures.